
Fully photographed crochet pattern showing how make a crochet rainbow rattle. Includes a video tutorial, step by step photos and written instructions.

If you liked the Crafty Rainbow Pillow crochet pattern then you are going to love the Crafty Rainbow Rattle!!
These little cuties work up in just an hour (maybe two), use very little yarn and would make a great, gender-neutral baby gift!
And for my maker-preneur friends, these are perfect for selling at craft shows or in your online shops becuase you can whip them up super quickly and you can market them to your customers as great gender-neutral baby gifts!
This post contains affiliate links meaning I may recieve a small commission from purchases made at no extra cost to you.
Here’s what you will need to make a crochet rainbow rattle

Materials
- G(4mm) size crochet hook
- 3 Colors of cotton worsted weight yarn. – I used I Love This Cotton in the colors Deep Teal, Rosey, and Antique Gold.
- Rattle Insert
- Polyfill
- Tapestry needle
Stitch Key (US Terms)
SC = Single Crochet
CH = Chain
INC= Increase (Put two stitches in the same space. In this case, it will be two SC stitches.)
SL ST= Slip Stitch
*= To Be Repeated
Special Stitches
Bobble: *YO, Insert hook into stitch and pull up a loop, YO and pull through 2 loops on your hook* Repeat 3 more times. Now you should have 5 loops on your hook. YO and pull through all 5 loops on your hook.
Back Bump: This is where you flip your starting chain over and insert your hook into the “back bump” of the chain and place your stitch there. If you are unfamiliar with this technique I would suggest watching this tutorial by Fiber Flux on YouTube. You do not have to use this technique, you can just single crochet as you normally would, but I feel like the back bump technique is cleaner.
How to change colors
Work your SC as normal but stop right before finishing the stitch, with 2 loops on your hook. Pick up your next color and pull it through the 2 loops on your hook, CH 1 and turn. Continue crocheting with your new color.
Watch the full video tutorial here
Purchase the ad-free PDF version of this pattern for only 3.00!

Body: Front Piece
Color 1
Make a slip knot and CH 11
Row 1: Skip the chain closest to your hook and SC 9 in the “back bump” of the chain. SC 6 in the last chain then SC 9 back down the other side of the starting chain. CH 1, turn. (24)
TIP: If you do not know how to crochet into the back bump of a chain please refer to the Youtube tutorial link provided under special stitches on the first page of this pattern.

Row 2: SC 9, INC in the next 6 stitches, SC 9. CH 1, turn. (30)

Row 3: *SC 1, BOBBLE* 14 times, SC in last two stitches. Changing yarn to Color 2 on the last SC. CH 1, turn. (30)
Color 2
Row 4: SC 9, *INC in the next stitch, SC in the next stitch* 6 times. SC 9. CH 1, turn. (36)

Row 5: SC 36. CH 1, turn. (36)

Row 6: SC 9, *SC in the next 2 stitches, INC in the next stitch* 6 times. SC 9. CH 1, turn. (42)

Row 7: SC 2 *BOBBLE, SC 1* 20 times. Changing yarn to Color 3 on the last SC. CH 1, turn. (42)

Color 3
Row 8: SC 9, *INC in the next stitch, SC in the next 3 stitches* 6 times. SC 9. CH 1, turn. (48)

Row 9: SC 48. CH 1, turn. (48)

Row 10: SC 9, *SC in the next 4 stitches, INC in the next stitch* 6 times. SC 9. CH 1, turn (54)

Row 11: *SC 1, BOBBLE* 26 times, SC in last two stitches. CH 1, turn. (54)
Cut yarn and tie off.

Body: Back piece
The back piece is made exactly like the front piece except the whole thing is made with color 3 and there are no bobble stitches, just single crochets.

Color 3
Make a slip knot and CH 11
Row 1: Skip the chain closest to your hook and SC 9 in the “back bump” of the chain. SC 6 in the last chain then SC 9 back down the other side of the starting chain. CH 1, turn. (24)
Row 2: SC 9, INC in the next 6 stitches, SC 9. CH 1, turn. (30)
Row 3: SC 30. CH 1, turn. (30)
Row 4: SC 9, *INC in the next stitch, SC in the next stitch* 6 times. SC 9. CH 1, turn. (36)
Row 5: SC 36. CH 1, turn. (36)
Row 6: SC 9, *SC in the next 2 stitches, INC in the next stitch* 6 times. SC 9. CH 1, turn. (42)
Row 7: SC 42. CH 1, turn. (42)
Row 8: SC 9, *INC in the next stitch, SC in the next 3 stitches* 6 times. SC 9. CH 1, turn. (48)
Row 9: SC 48. CH 1, turn. (48)
Row 10: SC 9, *SC in the next 4 stitches, INC in the next stitch* 6 times. SC 9. CH 1, turn (54)
Row 11: SC 54. CH 1, turn. (54)
Do not cut yarn.
Assembly
Lay your top piece on your bottom piece (right sides facing out)
Insert your hook into the first SC stitch on your top piece and into the first SC stitch on the bottom piece, grab your yarn, pull through both stitches and chain 1.

SC 54 around making sure to go through both the front and back pieces of the rattle and keeping the stitches paired up.


Do not cut yarn
Sew in all your tails.
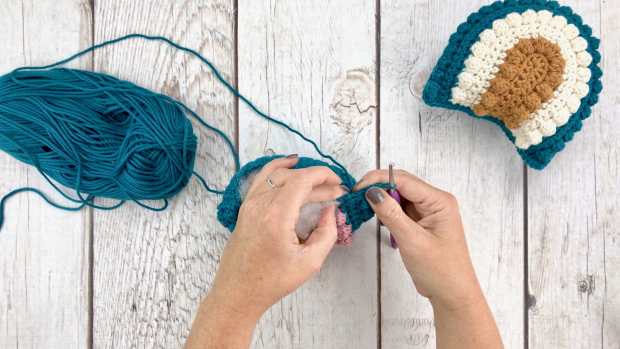
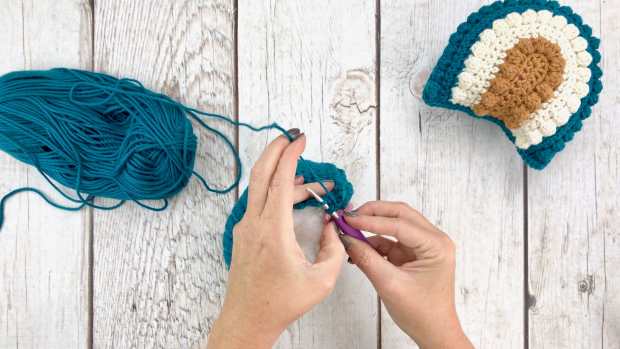
Separate your polyfill so that it’s not clumpy, and stuff your crochet rainbow rattle.

Insert your noise maker when your rattle is about half way stuffed, then stuff it the rest of the way.

Now we are going to crochet the bottom of the rainbow rattle closed.
Put 2 SC’s in the same space where you put your 54th stitch when attaching the front and back pieces of the pillow together.
Make your own spots and continue to SC across the bottom of the pillow, lining up your stitches.

Put 2 SC’s in the last stitch (where your first SC of the 54 went)

You should have about 25 SC stitches across the bottom of your rainbow.
Tie off and sew in your tail.

YOU’RE ALL FINISHED!!! How cute is your new Crafty Rainbow Rattle? Any parent would love to give this cutie to their little one!
Get creative with the color combos. If you are making these baby rattles to sell, try to research popular nursery color palettes, then when your customer sees a rainbow that matches their baby’s nursery they’ll HAVE to buy it ????.


I hope you guys love this pattern! Don’t forget to check out the Crafty Rainbow Pillow pattern and the Bitty Boho Bib pattern . I’m seeing some super cute, bobble-licious baby sets in your future!

If you make a Crafty Rainbow Rattle be sure to tag me on social media @ACraftyConcept. I would love to see your finished piece!!
Happy Crocheting
❤️Ashley