
WOAH WOAH YALL, Ashley here for a second. Hannah just launched her own crochet/maker/yarny blog and posted her first blog post! You have to check it out because she’s AMAZING!!!


So, you signed up for your first craft event….and it’s now a couple months away! As excited as you may be, you probably have a few (or 100!) questions.
How much stuff should I bring?
What if it rains?
How do I talk to my customers?
Should I take custom orders?
How much cash do I need?
What might go wrong that I can prepare for now?
Don’t panic! You’ll soon be a pro, trust me!

Why I love craft festivals!
Craft fairs and street festivals are a great way to meet different people and showcase your product! Selling online is great, but I really enjoy in-person transactions and seeing customer’s faces light up when they see the things that I’ve made.
I’ve been participating in local festivals for several years now and although each one is unique, I’ve managed to perfect my practices! (well, almost lol). But, I have managed to increase my profits from under $200 to $1000 within a couple years of setting up at the same festival.
Here are some things I’ve learned!
Design your booth to be attractive
Yes, it’s no lie that beauty sells when it comes to displaying your work! With my first event, I invested little time and effort to design my booth. I simply set up the tables, threw tables clothes on there and laid out my products flat on the table and hoped for the best. Don’t do this.
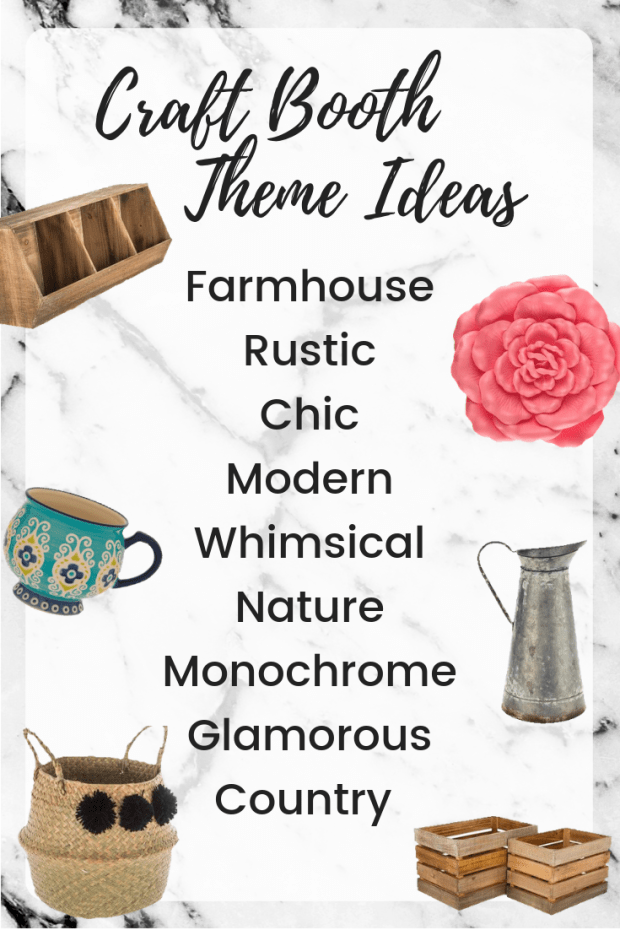
1. Think of a booth theme. This could simply be a pairing of colors used for tablecloths, shelving, signs, etc. If your booth looks put together, customers will feel more enticed to curiously wander in.
2. Invest in nice tablecloths in a color that goes with your theme. Those $1 flimsy tablecloths from Dollar Tree work great when you’re in a bind, but investing in a sturdy material will make your life so much easier in the future. Get creative! Consider going to a thrift store that sells discounted fabrics. You can easily find cheap curtains, outdoor fabric, nice sheet sets or other materials you can use! Your booth will thank you!
3. Think vertical! Elevate your products! The closer your goods are to the customer’s eye’s, the better. I like to stack wooden crates to create a display plus, it gives me more space to work with!
4. If you have products that are to be worn (hats, scarves, etc), consider hanging a mirror in your booth or getting a floor mirror.
5. Keep your booth tables fully stocked. An empty table isn’t appealing to customers. Consider packing table fillers like flowers, photos, etc. in case your stock gets low.
When in doubt, search Pinterest for display ideas! Consider practicing your setup ahead of time! It’s better to find out now that the tent you’re borrowing from your aunt is broken than 1 hour before the event begins! Take pictures for reference.
Payments
How much cash should you bring? Everyone has a different answer for what works for them. I typically bring $100 in cash. $70 in one dollar bills and $30 in five dollar bills. This probably sounds super odd and excessive…. and it probably is. I personally feel more comfortable having an excess amount of $1 bills around. Do what you think is best for you!
Most importantly, find a way to accept credit cards!! This is very important in today’s world of craft fairs and street festivals. I cannot count how many times people have asked me “Do you accept cards?” And most are thrilled when I answer yes.
There are several options out there for accepting credit cards! I use Square which sends you the swiping device for free and takes a percentage of each transaction. Etsy also has a swiping device and has a “Sell In Person” feature where you can manually enter in card numbers. I have used this many times as well!
Be sure to let your customers know that you accept cards! Many times, people assume you only accept cash which gives them a smaller budget than if they know they can easily swipe!
Practice your card swiping device before the event. Know how to use it!
Decide ahead of time your policy for checks. I personally never accept checks from strangers.
Custom Orders
Ashley has created a free Custom Orders PDF you can download HERE.

Plan ahead for custom orders and how (if at all) you plan to go about it. I do not accept custom orders anymore but have in the past at shows.
1. Have a notebook dedicated to orders.
2. Be sure to get all their information including name, phone number, shipping address, order details, etc.
3. And always, always, ALWAYS take full payment on any custom order you plan to take.
4. Set a max amount of custom orders you want to take during the event.
5. Let customers know exactly when they will expect their items.
Weather is unpredictable
It’s true…The forecast says the day will be sunny, 75 and clear! Sounds great! But halfway through the outdoor event, the clouds are looking quite dark….well, good thing you’ve prepared for this!
1. Make sure your tent is anchored during setup time. Wind can whisk away a tent very easily.
2. If the rain comes, lower your tent halfway to prevent wind from blowing water into your tent.
3. Have extra towels/ paper towels handy for any unwanted water.
4. Keep an eye for any pooling water on top of your tent. Extra weight can cause the metal to bend.
5. Invest in $1 shower liners and use these to cover your tables and products to keep them dry!
Be organized!
1. Know when you need to be where. Plan out your trip, giving yourself more than enough time to unload and setup. This process can take surprisingly longer than you would think, especially if you have to haul your equipment over a distance.
2. Tag and price before the event. Ashley designed some fun “Handmade with Love” tags you can download for free HERE. I also have a Mystery Grab Bag set of Cardstock tags available in my Etsy shop!

Pro Tip: If you want to save money on printing check out THIS BLOG POST about savings at Office Depot.
Here is another free tag template from my friend Taylor at www.Taylor-Lynn.com. She gives you a premade template and goes over, in a video, how to customize the template for your branding and how to print/prepare them for your market!
3. Have a list of your inventory so you can easily account for what you sold during the show. You can download Ashely’s free blank inventory template HERE

4. Have the event organizer’s number on hand in case you are lost or need clarification for anything.
5. Have a dedicated spot for cash. Do not leave a cash box in the open. They are easy to swipe! I personally like to keep cash on me in a small apron with pockets. It makes cash transactions very easy!

6. Have a dedicated spot for pens, phone, business cards, notebook, etc.
7. Pack the car the night before!
Customer Interactions
We’ve all been to a retail store where as soon as your hand touches the door to walk in, you’re surrounded by employees asking you questions about what you’re looking for, to try a product, take a sample…..it’s exhausting right? Let your customers breathe. But don’t ignore them. A simple “Hey, how’s it going” is laid back enough to let your customers know you’re there to help but that you’re not going to harass them during their visit.
1. Act busy in your booth when customers are browsing. Rearrange items, act like you’re taking notes in a notebook, etc. Customers like knowing they aren’t your sole focus. They want to look at your prices and not feel guilty for putting down an item that’s out of their price range. (We’ve all done it).
2. If a customer is lingering, don’t be afraid to ask them if they have any questions or to make a comment about the product they are looking at. But….
3. Don’t be scripted, you aren’t a telemarketer. Have genuine conversations with people, you will meet some wonderful souls!
4. People can be mean. You will get hateful comments on your prices. You will have people try to negotiate. “Well, my grandmother’s cousin can make this for half that!”
You’ll want to roll your eyes and toss them out of your tent, but don’t! Be polite and explain that you don’t have any sales going on at this time. 90% of the time, these people who believe that their friend can make it for cheaper can’t, and they’ll come back and buy your product.
Other helpful info!
1. Bring a friend! If it gets busy, you’ll be thankful to have someone who can help with math when your brain is overwhelmed or when you need a bathroom break!
2. Write the event organizer a thank you note! A lot of work goes into preparing and showing your gratitude can help you secure a spot in the show next year.
3. Don’t be upset if your event doesn’t go just as planned. You may have shows where you sell nothing or that get rained out. Just stay positive! The next one will be better, I promise!
4. Pack up your booth in an organized way. Throwing stuff in boxes is tempting after 10 hours of work, but you’ll be thankful later you didn’t.
5. Don’t pack up early! Many other vendors enjoy shopping after the event is over.
6. Bring water and snacks. Do it.
7. Find out if you’ll be next to live music. You may need earplugs to prevent headaches.
8. Bring a change of clothes to leave in your car. You never know what can happen.
9. Bring a real calculator.
10. If your event is on a public street, prepare to bring something to level out your tables. Public streets are made to slant to drain water. Nothing worse than your items going all rolly polly all day long.
The ultimate festival checklist!
You can download a PDF version of this list HERE

Setup:
1. Tent
2. Tables x _______
3. Table Cloth x ______
4. Chairs
5. Display items (crates, racks etc.)
6. Tent weights / anchors
7. Zip ties (great for hanging and securing things)
8. Clothespins, ropes etc.
9. Signage
10. Mirror
Personal:
11. Sunscreen and bug spray
12. Small cooler with drinks and snacks
13. Change of clothes and socks
14. Wet wipes
15. Tylenol
16. Garbage bags
17. Paper Towels
18. Hygiene items
19. Comfortable shoes
20. Poncho
21. Mints
22. Hand Sanitizer
23. Band-Aids / First Aid
Other:
24. CASH
25. Card Swiping System (Square, Etsy, etc.)
26. Place to keep your cash
27. Pens
28. Phone charging cable and power bank
29. Shower curtain liners
30. Fire Extinguisher (Check if your event requires this)
31. Bags (grocery or store-bought)
32. Business cards
33. Extra Tags / Labels
34. Calculator (don’t rely on your phone)
35. Duct tape and clear tape
36. Lint Roller
37. Scissors
38. Photos of booth setup
39. Safety Pins
40. Hammer
41. Craft supplies for downtime
42. Twine
*Note that many of these items will not apply to an indoor craft event.*
Craft events can seem super stressful at first but the work will pay off! Be sure to make time for fun!
Thank you so much for letting me hang out with you guys over here on A Crafty Concept Blog. I hope you guys loved the post and found it super helpful. Good luck to you at your craft festivals this festival season, I wish you all the success! Be sure to follow me over on Instagram for lots of crochet squishiness, and check out my Etsy shop for some fun crochet patterns!
If you would like to read more about Craft Festivals, here are some awesome posts by other amazing makers in our community…
Market Display Ideas- How to make your craft fair booth beautiful!– By Taylor Lynn Crochet
Craft Show Essentials– By Meghan Makes Do
Free Printable Price & Care Tags– By Meghan Makes Do
Best Sellers for Craft Shows– By Meghan Makes Do
How To Create A Display For Craft Shows – By Meghan Makes Do
How to Create Inventory for a Craft Show– By Meghan Makes Do
How To Find and Apply To Craft Shows – By Meghan Makes Do
How to Prepare for Your First Ever Craft Fair [Instagram LIVE Replay]– By TLYarnCrafts
9 Question to Ask Before Committing to a Craft Show– By TLYarnCrafts
9 Question to Ask Before Committing to a Craft Show– By TLYarnCrafts
Comments are closed.