Learn how to crochet an easy, textured beanie with this simple lemon peel stitch crochet hat pattern.
As the weather continues to keep getting colder here in Kentucky, I thought now would be a good time to release a new crochet hat pattern.
Introducing the newest gal in the ACC crochet pattern catalog, the Charlie Hat!
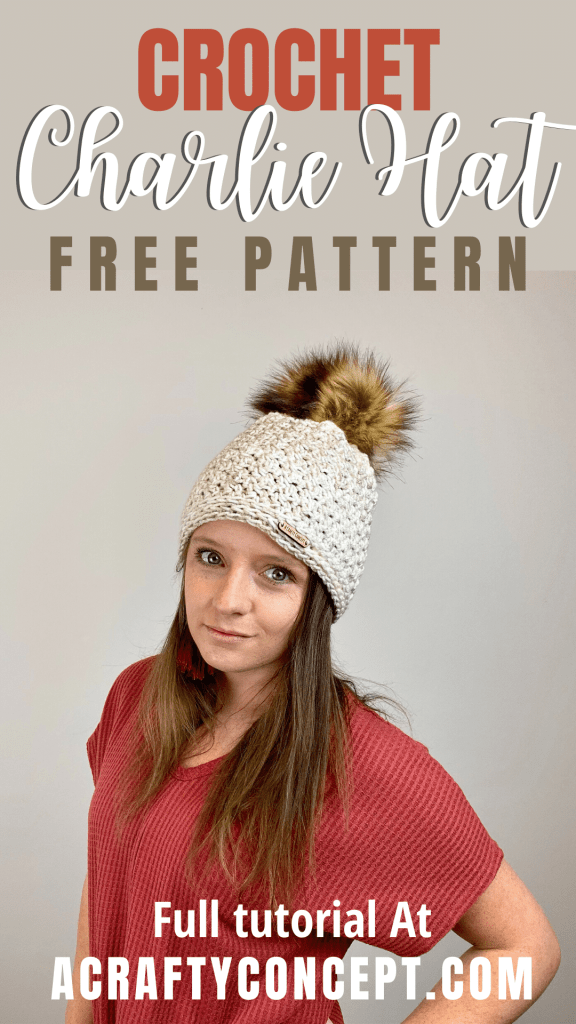
Charlie is made using the lemon peel stitch, which is just alternating single crochet stitches and double crochet stitches. If you have ever made the Easy Peasy Lemon Squeezy headband, this beanie is basically an extended version of that.
This beanie was designed to fit AFTER it had been stretched a little. This way it won’t turn into a floppy mess after it’s been worn a couple times.
After you make your beanie, go around the brim a little bit with your hands giving it a gentle tug.
If your tension is too tight the beanie won’t fit properly. If you know you have super tight tension when you crochet, I would add 2 (or even 4) stitches to whatever size you are wanting to make.
Example: The adult size has 50 stitches, yours would have either 52 or 54 stitches.
I suggest making a gauge swatch before starting.
You can find the ad-free PDF download for this pattern in my shop for only 3.00

and for my visual learners, you can watch the full video tutorial here.
I tried to go really super slow this time to make the video extra beginner-friendly.
Some of the links in this post may be affiliate links, meaning I may receive a small commission, at NO ADDITIONAL cost to you, from purchases made using the links provided.

Don’t forget your freebie! Sign up to my email list and you’ll receive the 2021 Content Calendar for crocheters absolutely free, and start receiving other handy freebies from me every week!
Here’s what you will need to make this crochet hat pattern
Charlie Hat
Sizes
Adult- fitting heads with a 22-23 inch circumference
Child- fitting heads with a 20-21 inch circumference
Toddler- fitting heads with an 18-19 inch circumference
Finished Dimensions
Adult- about 9.5 inches tall and 8.5 inches wide.
Child- about 8.5 inches tall and 7.5 inches wide.
Toddler- about 7 inches tall and 6.5 inches wide.
Gauge: 13 stitches by 13 rows = 4×4 square. Single Crochets

Materials
– Yarn Bee Soft and Sleek
– Size J crochet hook– I am using my clover amour size J which I find gives me the same gauge as a Susan Bates size I hook.
– Scissors
– Tapestry Needle
– Faux Fur Pom (optional)
Want to give your finished beanie a more professional look? Try adding a custom handmade tag.
Stitch Key
CH- Chain
SC- Single Crochet
DC- Double Crochet
* Repeat
Special Stitches
Lemon Peel Stitch: The whole headband is made using the Lemon Peel Stitch. If you are not familiar with this stitch don’t worry, I will explain below.
Single Crochet in Camel Hump
Tilt your work forward so you can see the back of your stitches. Look for the horizontal bar on the back of your SC stitches. Place your stitch there to crochet in the camel hump.
Pattern
Leaving about a 12″ tail
CH 50 (46 for the child size – 42 for toddler size). Join back into your first stitch (being careful not to twist your chain). CH 1.
Row 1: SC in the first stitch by your CH 1. DC in the next space*. Continue to SC, DC all the way around ending with a DC. Join into the top of your first stitch. CH 1. Turn your work.
Row 2-23 (19 for the child size – 15 for the toddler): SC, DC* all the way around ending with a DC. Join into the top of your first stitch. CH 1. Turn your work.

Brim- Camel Hump
Do not turn your work after row 23.
Row 24 ( 20 for the child size – 16 for the toddler): SC around. Join into the top of your first SC. CH 1. Do not turn your work.
Rows 25-26 ( 21-22 for the child size – 17-18 for the toddler ): SC around in the camel hump. Join into the top of the first stitch. CH 1. Do not turn your work after row 25.


Tie off.
Closing

To close the top of your beanie, thread your first tail onto a tapestry needle. Sew a running stitch by weaving your needle in and out of the opening of your beanie and pulling your tail tight.

Go around like this a couple of times until your hole is completely closed.

Sew in all your tails.
Add an optional faux fur or yarn pom and you’re all finished!!

I hope you guys loved this pattern. I always drool over the texture that’s created with the lemon peele stitch. I think it’s so pretty!

If you make a Charlie Hat and share a pic, I’d love to see it. You can tag me @ACraftyConcept on social media or use the #CharlieHat and I’ll see it. I love sharing pictures of yall’s work on my Instagram stories and on my Facebook page!
Thanks for hanging out with me.
Happy Crocheting
❤️Ashley